When the holiday season rolls in and the air is filled with the sweet scent of cocoa, I can’t help but think of my favorite Christmas tradition: baking homemade Oreo cookies. There’s something truly special about crafting these delightful treats from scratch, especially when I see the smiles on my family’s faces as they enjoy them.
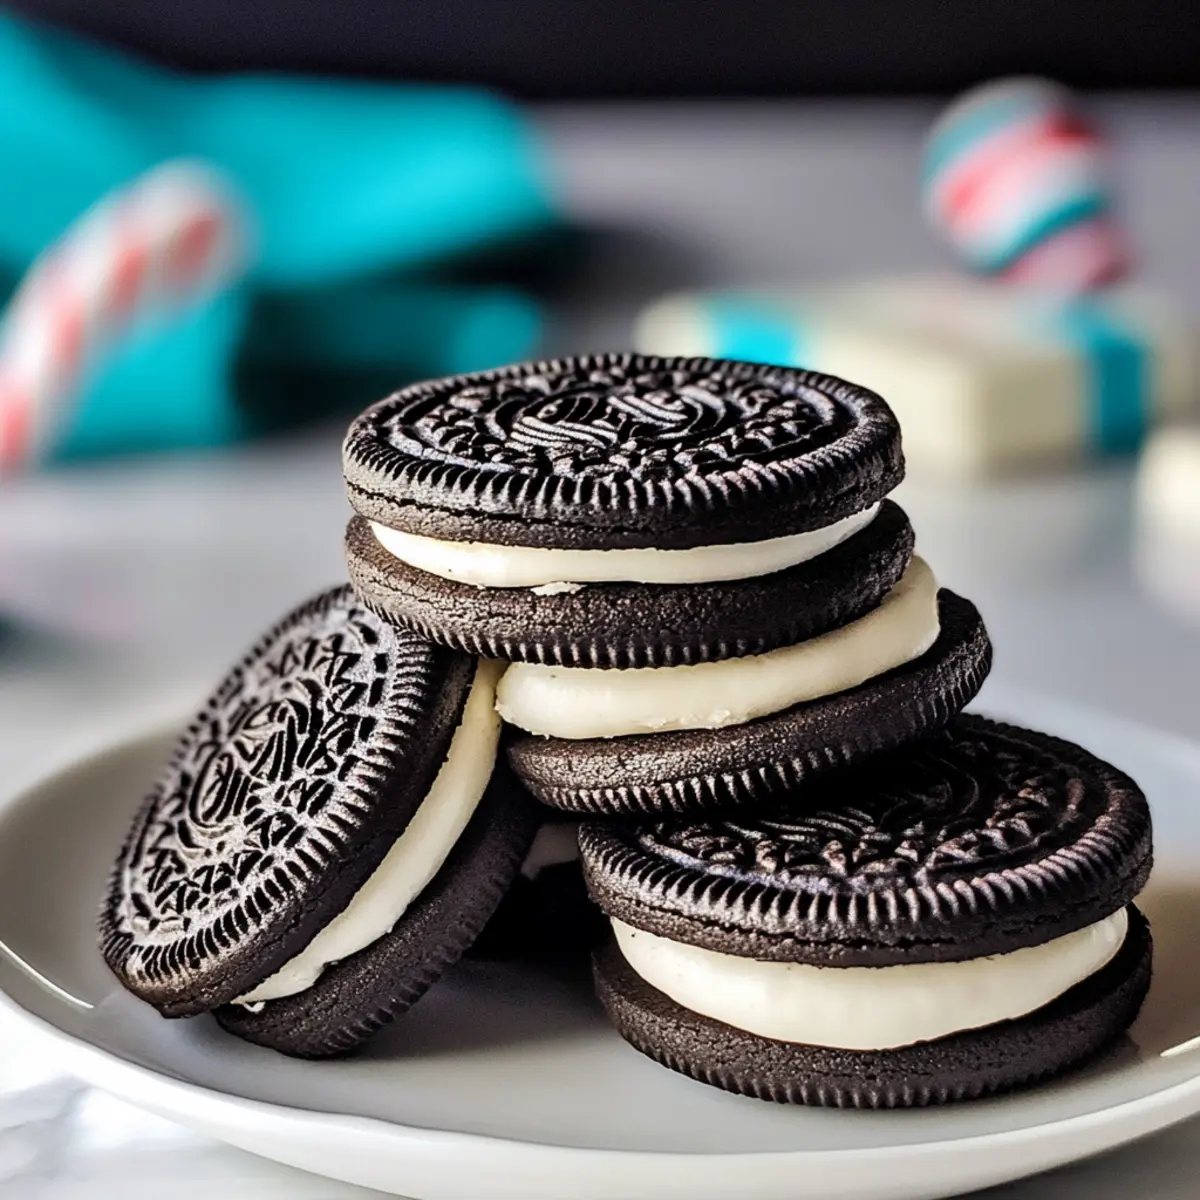
The beauty of these Christmas Oreo cookies lies in their simplicity and versatility. With just a few pantry staples, you’ll create a pair of soft, chocolatey cookies that perfectly sandwich a creamy filling. This recipe has quickly become a beloved favorite, uniting everyone around the table for some festive fun. Plus, they’re quick to whip up—who doesn’t love a homemade treat ready in just 30 minutes?
So, whether you’re planning a festive gathering or simply want to indulge in something delicious after a hectic day, join me in creating these scrumptious Christmas Oreo cookies that are sure to spread joy and warmth this holiday season!
Why You'll Love This Christmas Oreo Cookies
- These Christmas Oreo cookies are a breeze to make, allowing you to whip up a delightful treat in just 30 minutes.
- The rich chocolate flavor combined with the creamy filling creates an irresistible taste sensation that will have everyone coming back for more.
- Their charming appearance makes them a festive centerpiece for any holiday gathering, ensuring they stand out on your dessert table.
- Plus, they are versatile enough to be adapted with different fillings or decorations, making them perfect for personalizing your holiday baking experience.
Christmas Oreo Cookies Ingredients
• The key to baking bliss!
For the Cookies
- 1 ½ cups all-purpose flour – This forms the base, giving structure to your cookies.
- ¾ cup unsweetened cocoa powder – Adds a deep chocolate flavor essential for classic Oreo taste.
- 1 tsp baking soda – Helps the cookies rise to a soft, chewy texture.
- ½ tsp salt – Balances the sweetness and enhances the overall flavor.
- ½ cup granulated sugar – Sweetens the dough for that perfect cookie sweetness.
- ½ cup packed brown sugar – Adds moisture and a hint of molasses flavor.
- 1 cup unsalted butter, softened – Provides richness and a tender crumb for the cookies.
- 2 large eggs – Binds ingredients while contributing to a moist texture.
- 2 tsp vanilla extract – Infuses the dough with a warm, inviting aroma.
For the Cream Filling
- 2 cups powdered sugar – Creates a sweet, fluffy filling that sandwiches the cookies together.
- ½ cup unsalted butter, softened – Adds smoothness and richness to your filling.
- 1 tsp vanilla extract – Enhances the flavor, making every bite decadent.

How to Make Christmas Oreo Cookies
-
Preheat your oven to 350°F (175°C). Line two baking sheets with parchment paper to prevent sticking. This ensures your cookies have a lovely, golden edge when they bake!
-
Whisk together the all-purpose flour, cocoa powder, baking soda, and salt in a mixing bowl. This dry blend establishes the cookie’s foundation, creating a deliciously rich and chocolatey texture.
-
Cream the softened butter, granulated sugar, and brown sugar in another bowl until it’s light and fluffy. This step is crucial for achieving that airy cookie texture, so take your time! Add in the eggs one at a time, mixing well, then stir in the vanilla extract for that familiar warmth.
-
Combine the dry ingredients with the wet mixture gradually, ensuring it’s just mixed. Overmixing could lead to tough cookies, and we want them soft and tender—just like a classic Oreo!
-
Scoop tablespoon-sized balls of dough onto your prepared baking sheets, giving each ball space of about two inches apart. Bake them for around 10 minutes, watching for the edges to set while the centers remain soft and slightly puffy.
-
Beat together the softened butter and powdered sugar for the cream filling until it’s fluffy and smooth. Adding the vanilla extract here enhances the flavor of your creamy center.
-
Sandwich the luscious cream filling between two cooled cookies. Gently press them together until a delightful filling oozes slightly from the edges—pure cookie perfection!
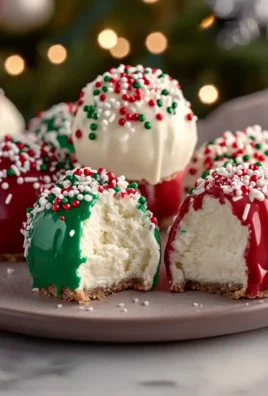
Optional: Dust with cocoa powder or colored sprinkles for a festive touch!
Exact quantities are listed in the recipe card below.
Make Ahead Options
These Christmas Oreo cookies are perfect for meal prep enthusiasts looking to save time during the busy holiday season! You can prepare the cookie dough up to 24 hours in advance; just wrap it tightly in plastic wrap and refrigerate. Additionally, the cream filling can be made ahead and stored in the fridge for up to 3 days in an airtight container. When you’re ready to bake, scoop and bake the chilled cookie dough straight from the fridge. Once the cookies have cooled, simply sandwich them with the cream filling for a delightful treat that’s just as delicious as if freshly made. This way, you’ll have scrumptious homemade cookies ready to impress your family and friends with minimal effort!
Christmas Oreo Cookies Variations
Feel free to let your creativity shine by customizing these delightful cookies to suit your taste buds!
-
Gluten-Free: Substitute with a gluten-free all-purpose flour blend for a deliciously safe option for those with gluten sensitivities.
-
Minty Twist: Add ½ teaspoon of peppermint extract to the filling for a refreshing holiday flavor that adds a lovely surprise!
-
Nutty Delight: Fold in ¾ cup of crushed nuts, like walnuts or pecans, into the cookie dough for an added crunch and nutty flavor.
-
Dark Chocolate: Use dark cocoa powder instead of regular cocoa for a richer, deeper chocolate flavor that will make these cookies simply irresistible.
-
Chunky Chocolate: Mix in 1 cup of chocolate chips or chunks into the cookie dough for extra gooeyness in every bite.
-
No-Bake Filling: For a creamier filling, swap half the butter for cream cheese, creating a tangy twist that beautifully contrasts the soft cookie.
-
Spicy Kick: Sprinkle in a dash of cayenne pepper or chili powder into the batter for a surprising, spicy twist that will excite your palate.
-
Holiday Colors: Fold in seasonal sprinkles into the filling or on top of the cookies to bring a festive touch to your holiday spread!
What to Serve with Christmas Oreo Cookies?
Imagine a cozy winter evening filled with laughter, love, and sweet treats that evoke the magic of the holidays.
- Cold Glass of Milk: The classic pairing! Milk’s creaminess complements the rich chocolate and creamy filling perfectly.
- Fudgy Brownies: Add another layer of chocolate goodness—rich, dense, and utterly indulgent, brownies will satisfy any chocolate lover.
- Peppermint Hot Chocolate: Embrace the holiday spirit with this festive drink. The cool mint flavor beautifully contrasts the richness of the cookies.
- Whipped Cream Topped Coffee: A warm cup of coffee topped with whipped cream makes for a cozy companion, balancing sweetness with a rich flavor.
- Gingerbread Cookies: The spicy warmth of gingerbread adds a festive twist to your dessert spread, complementing the Oreo’s chocolate.
- Fruit Salad: A fresh fruit salad provides a refreshing balance, with zesty and sweet notes that lighten your dessert table.
- Vanilla Ice Cream: The creamy texture of vanilla ice cream makes every bite divine, creating a delightful contrast to the cookie’s crunch.
- Chocolate Sauce Drizzle: Elevate your presentation with a drizzle of chocolate sauce on the side—perfect for dipping and extra indulgence!
- Eggnog: Create a nostalgic celebration with a glass of rich, creamy eggnog; its spices echo the holiday season and pair exquisitely.
How to Store and Freeze Christmas Oreo Cookies
Room Temperature: Store cookies in an airtight container at room temperature for up to 3 days to maintain their freshness and flavor.
Fridge: If you’d like to extend their life, keep the cookies in the fridge for up to 1 week. Just ensure they’re in an airtight container to avoid dryness.
Freezer: Freeze the cookies for up to 3 months. Place them in a single layer in a freezer-safe container, separating layers with parchment paper.
Reheating: To enjoy your cookies warm, microwave them for about 10-15 seconds. This revitalizes their soft texture, making your Christmas Oreo cookies feel freshly baked!
Chef's Helpful Tips
- When making Christmas Oreo Cookies, ensure your butter is at room temperature for optimal creaming with the sugars, as this will help achieve that light and fluffy texture.
- Be careful not to overmix the dough once you combine the wet and dry ingredients; this will keep your cookies tender and prevent them from becoming tough.
- For the filling, using a mixer on high speed will give you a light and fluffy center, so don’t rush this step.
- Lastly, bake your cookies until the edges are set but the centers still look slightly underbaked to ensure they remain soft and chewy once cooled.
Christmas Oreo Cookies Recipe FAQs
What type of cocoa powder should I use for these cookies?
Absolutely! I recommend using unsweetened cocoa powder for the best chocolate flavor. Avoid Dutch-processed cocoa for this recipe, as it won’t provide the same rich taste and can affect the leavening.
How should I store leftover Christmas Oreo cookies?
To keep your cookies fresh, store them in an airtight container at room temperature for up to 3 days. This method preserves their soft texture and flavor. If you want to enjoy them for a bit longer, placing them in the fridge can extend their freshness up to a week!
Can I freeze the Christmas Oreo cookies?
Yes! To freeze your cookies, first let them cool completely. Then, place them in a single layer in a freezer-safe container, separating the layers with parchment paper. They can be frozen for up to 3 months. When you’re ready to enjoy them, simply let them thaw at room temperature or warm them in the microwave for 10-15 seconds.
What should I do if my cookies spread too much during baking?
Very! If your cookies are spreading too much while baking, double-check if your butter was too soft or melted. Using butter that’s just at room temperature is key! You can also chill the dough for about 30 minutes before baking; this helps maintain their shape during baking.
Are these cookies safe for my pets?
No, it’s best to avoid giving these cookies to your pets. The chocolate in the cookies can be toxic to dogs and cats. Always keep homemade treats out of their reach to ensure they stay safe!
Can I substitute any ingredients for dietary restrictions?
Of course! If you need a dairy-free option, you can use dairy-free butter and plant-based milk in the filling. For those avoiding gluten, a 1:1 gluten-free flour blend can work in place of all-purpose flour, ensuring everyone can enjoy these delicious Christmas Oreo cookies!
Equipment
- mixing bowl
- Baking sheets
- parchment paper
- Whisk
- Mixer
- Scoop
Ingredients
For the Cookies
- 1.5 cups all-purpose flour This forms the base, giving structure to your cookies.
- 0.75 cups unsweetened cocoa powder Adds a deep chocolate flavor essential for classic Oreo taste.
- 1 tsp baking soda Helps the cookies rise to a soft, chewy texture.
- 0.5 tsp salt Balances the sweetness and enhances the overall flavor.
- 0.5 cups granulated sugar Sweetens the dough for that perfect cookie sweetness.
- 0.5 cups packed brown sugar Adds moisture and a hint of molasses flavor.
- 1 cup unsalted butter, softened Provides richness and a tender crumb for the cookies.
- 2 large eggs Binds ingredients while contributing to a moist texture.
- 2 tsp vanilla extract Infuses the dough with a warm, inviting aroma.
For the Cream Filling
- 2 cups powdered sugar Creates a sweet, fluffy filling that sandwiches the cookies together.
- 0.5 cups unsalted butter, softened Adds smoothness and richness to your filling.
- 1 tsp vanilla extract Enhances the flavor, making every bite decadent.
Instructions
Making the Cookies
- Preheat your oven to 350°F (175°C). Line two baking sheets with parchment paper to prevent sticking.
- Whisk together the all-purpose flour, cocoa powder, baking soda, and salt in a mixing bowl.
- Cream the softened butter, granulated sugar, and brown sugar in another bowl until light and fluffy. Add in the eggs one at a time, mixing well, then stir in the vanilla extract.
- Combine the dry ingredients with the wet mixture gradually, ensuring it’s just mixed.
- Scoop tablespoon-sized balls of dough onto your prepared baking sheets, spacing them about two inches apart. Bake for around 10 minutes.
- Beat together the softened butter and powdered sugar for the cream filling until fluffy and smooth. Add the vanilla extract.
- Sandwich the cream filling between two cooled cookies.


Leave a Comment