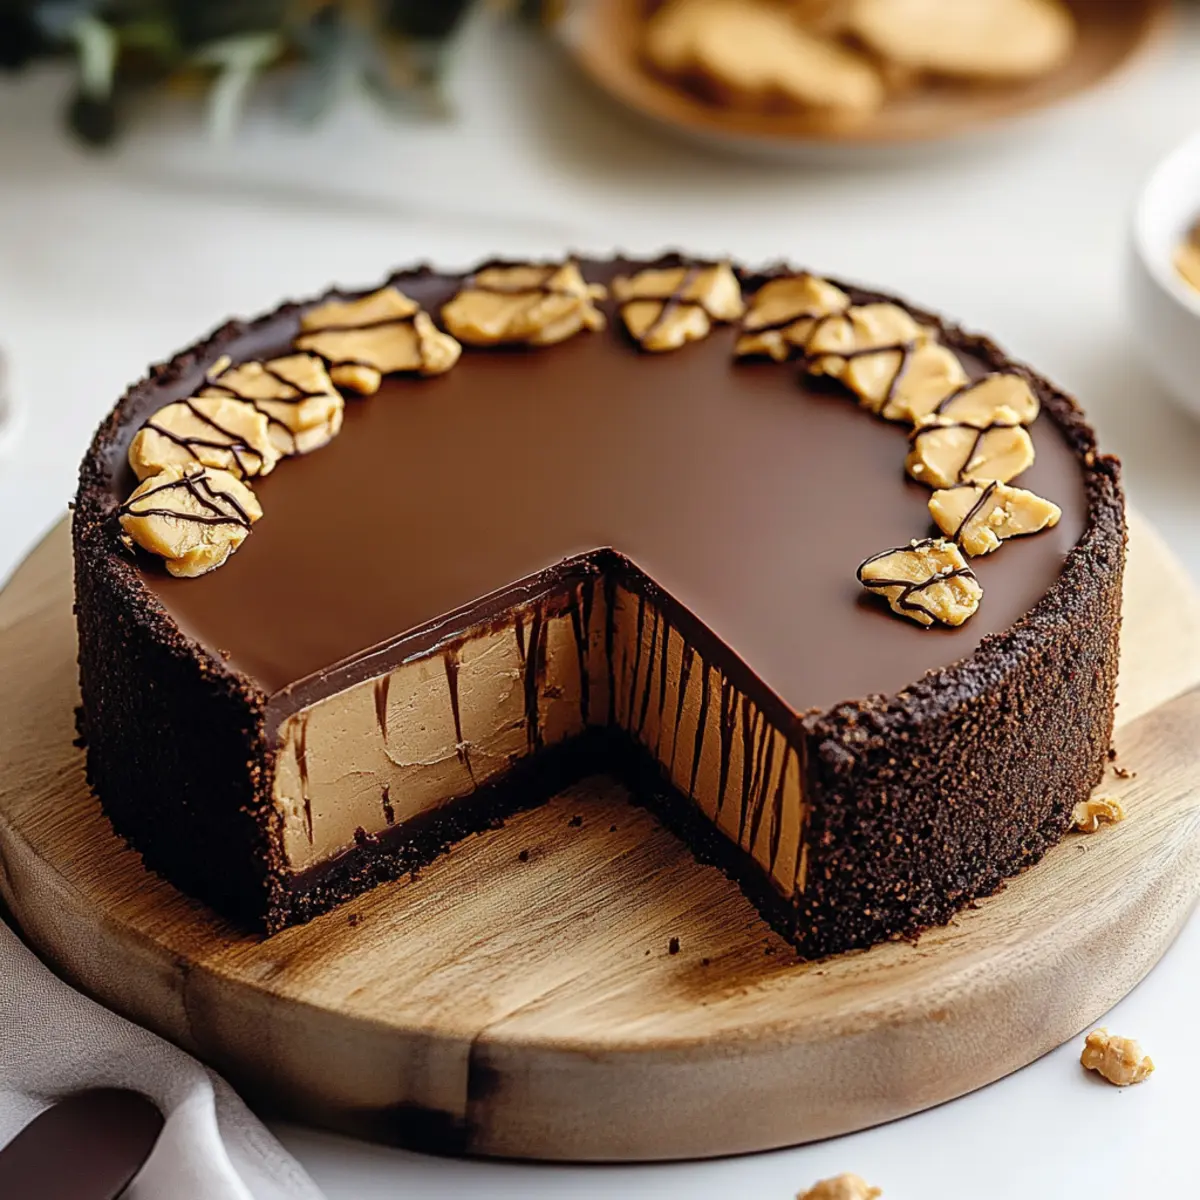
When the holiday season rolls around, my kitchen transforms into a cozy haven, filled with laughter, joy, and the mouthwatering aromas of freshly baked treats. This Holiday Chocolate Peanut Butter Cheesecake has become a staple at my gatherings, captivating everyone from kids to adults with its rich, creamy layers of chocolate and peanut butter bliss.
I discovered this recipe a few years ago, and it quickly became a cherished family tradition. The beauty of this cheesecake lies not just in its indulgent flavors but also in its simplicity. With just a handful of ingredients and a little time, you can create an unforgettable dessert that will leave your friends and family asking for seconds—if not thirds!
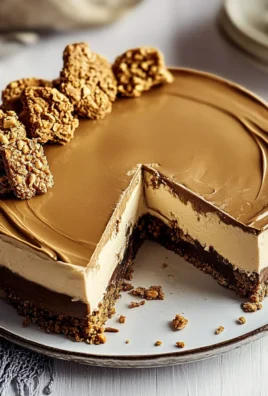
So, whether you’re looking for a show-stopping centerpiece for your holiday table or a sweet treat to elevate your casual get-together, this cheesecake will surely impress without the fuss. Let’s dive into the velvety goodness that awaits and make your next celebration truly special!
Why You'll Love This Holiday Chocolate Peanut Butter Cheesecake
- This Holiday Chocolate Peanut Butter Cheesecake is a breeze to make, requiring just a handful of simple ingredients and minimal prep time.
- The decadent combination of chocolate and peanut butter will tantalize your taste buds and leave everyone craving more.
- Its stunning layers and rich flavors make it a visually impressive centerpiece for any gathering or holiday table.
- Best of all, this cheesecake is a guaranteed crowd-pleaser, sure to bring smiles and satisfaction to both kids and adults alike.
Holiday Chocolate Peanut Butter Cheesecake Ingredients
Get ready to elevate your dessert game with these essential ingredients!
For the Crust
- Crushed graham crackers – Add a classic, buttery crunch that complements the creamy filling.
- Unsalted butter – Melted to bind the crumbs together for a solid base.
For the Filling
- Cream cheese – Softened to ensure a smooth, luscious texture in every bite.
- Granulated sugar – Adds just the right amount of sweetness to balance the flavors.
- Creamy peanut butter – Infuses richness and nutty flavor that elevates the cheesecake experience.
- Heavy whipping cream – Whipped to stiff peaks for a light and airy filling.
- Unsweetened cocoa powder – Introduces a deep chocolate flavor, making this a true Holiday Chocolate Peanut Butter Cheesecake.
- Vanilla extract – Enhances the overall taste with a warm, aromatic touch.
This combination of ingredients is the foundation for a dessert that is not only delicious but also a perfect treat for your holiday celebrations!

How to Make Holiday Chocolate Peanut Butter Cheesecake
-
Preheat your oven to 350°F (175°C). This step is crucial for baking the cheesecake evenly, so make sure your oven reaches the temperature before you start assembling the crust.
-
Mix the crushed graham crackers with the melted butter in a bowl. Combine until the crumbs resemble wet sand, then press the mixture firmly into the bottom of a springform pan for a strong and delicious crust.
-
Beat the softened cream cheese and granulated sugar together in a mixing bowl until completely smooth. This step is important to avoid lumps; add the creamy peanut butter and unsweetened cocoa powder, mixing until everything is beautifully combined.
-
Whip the heavy cream in a separate bowl until you reach stiff peaks. Gently fold this whipped cream into the cream cheese mixture, allowing the filling to become light and fluffy.
-
Pour half of the luscious filling over the prepared crust. If you’re feeling adventurous, swirl in some extra peanut butter for a delightful surprise! Then, top with the remaining filling to create those beautiful layers.
-
Bake in the preheated oven for 50-60 minutes. You want the edges to be set while the center remains slightly jiggly—this ensures a creamy texture once cooled.
-
Cool the cheesecake at room temperature for 1-2 hours, then refrigerate for at least four hours, or preferably overnight. This chilling step will allow the flavors to meld together beautifully.
Optional: Drizzle with chocolate sauce before serving for an extra touch of sweetness!
Exact quantities are listed in the recipe card below.
Holiday Chocolate Peanut Butter Cheesecake Variations
Get ready to make this delightful cheesecake truly yours with these exciting twists!
-
Gluten-Free: Swap graham crackers for gluten-free cookie crumbs to keep the crust delicious for everyone.
-
Chocoholic: Add a layer of chocolate ganache on top for an extra rich chocolate flavor that will satisfy even the biggest chocolate lovers.
-
Nut-Free: Use sunbutter in place of peanut butter for a nut-free yet equally scrumptious filling that’s perfect for those with allergies.
-
Lower Sugar: Substitute half the granulated sugar with a natural sweetener like stevia or monk fruit for a healthier option without sacrificing taste.
-
Fruit Infusion: Fold in some fresh raspberries or strawberries into the filling for a vibrant fruity flavor that beautifully offsets the richness.
-
Spicy Kick: Add a pinch of cayenne or chili powder to the chocolate mixture for an unexpected and exciting heat that tantalizes your taste buds.
-
Dairy-Free: Use a vegan cream cheese and coconut cream instead of heavy cream, allowing dairy-free friends to enjoy this luscious dessert too!
-
Chocolate Chip Surprise: Mix in chocolate chips into the filling for delightful pockets of melted chocolate in every bite.
Feel free to experiment with these alternatives to make this luscious cheesecake fit your taste and dietary preferences, ensuring every slice is a new adventure!
Storage Tips for Holiday Chocolate Peanut Butter Cheesecake
Fridge: Store the cheesecake in an airtight container in the refrigerator for up to 5 days. This keeps it fresh and maintains its creamy texture.
Freezer: If you want to save some for later, wrap individual slices tightly in plastic wrap and then in aluminum foil. It can be frozen for up to 3 months without losing its delightful flavors.
Thawing: To enjoy frozen slices, transfer them to the fridge the night before you plan to serve. This gentle thawing process helps retain the cheesecake’s rich, velvety consistency.
Reheating: While it’s best served chilled, if you prefer it slightly warm, place a slice in the microwave for about 10-15 seconds—just enough to take off the chill without melting it!
Make Ahead Options
These Holiday Chocolate Peanut Butter Cheesecake bites are a perfect choice for meal prep enthusiasts! You can prepare the crust and filling up to 24 hours ahead of time. Start by mixing the crushed graham crackers with melted butter and pressing the mixture into the springform pan. Then, make the filling by combining cream cheese, sugar, peanut butter, and cocoa powder before gently folding in whipped cream. Store these components separately in airtight containers in the refrigerator, ensuring freshness and flavor. When you’re ready to serve, simply pour the filling over the crust and bake; your cheesecake will turn out just as delicious as if made fresh that day, saving you time and stress for your holiday gatherings!
What to Serve with Holiday Chocolate Peanut Butter Cheesecake?
Creating a memorable meal is all about the delightful combinations that elevate your dessert experience.
-
Fresh Berries: Add a burst of vibrant color and tartness to balance the richness of your cheesecake.
-
Whipped Cream: A dollop of homemade whipped cream enhances the creaminess and adds lightness to each bite.
-
Chocolate Sauce: Drizzling warm chocolate sauce over the cheesecake can intensify the chocolate flavor, making it truly decadent.
-
Coffee: A strong cup of coffee pairs beautifully, cutting through the richness while enhancing the dessert’s flavors.
-
Mint Leaves: Fresh mint leaves offer a refreshing contrast, brightening each bite with a hint of herbal coolness.
-
Ice Cream: A scoop of vanilla or coffee ice cream beside the cheesecake brings a delightful temperature contrast and extra creaminess.
With these pairings, your Holiday Chocolate Peanut Butter Cheesecake will shine even brighter at your next gathering.
Chef's Helpful Tips
- For the Holiday Chocolate Peanut Butter Cheesecake, ensure your cream cheese is fully softened to achieve a smooth and lump-free filling.
- Avoid overmixing the cream when whipping it to stiff peaks, as this can lead to a grainy texture in your cheesecake.
- When baking, keep a close eye on the cheesecake towards the end of the cooking time; the edges should be set while the center still jiggles slightly for the best texture.
- After baking, allow the cheesecake to cool at room temperature before refrigerating, as this helps prevent cracks on the surface.
Holiday Chocolate Peanut Butter Cheesecake Recipe FAQs
How do I choose ripe ingredients for my cheesecake?
Absolutely! For the best flavor and texture, ensure your cream cheese is at room temperature, so it blends smoothly. Choose a peanut butter that’s creamy and free of added sugars or preservatives for the richest taste. The heavy whipping cream should also be fresh, so check the expiration date and opt for brands with no additives for optimal results.
What is the best way to store leftover cheesecake?
Very! To keep your Holiday Chocolate Peanut Butter Cheesecake fresh, store it in an airtight container in the refrigerator for up to 5 days. This will maintain its creamy texture while preventing it from absorbing odors from other foods. If you notice any dark spots on the surface, those are signs the cheesecake may be past its prime, so enjoy it while it’s at its best!
Can I freeze the cheesecake, and how do I do it?
Absolutely, you can freeze your cheesecake! To do this, wrap individual slices tightly in plastic wrap and then in aluminum foil, which helps prevent freezer burn. Place them in a freezer-safe container or bag. It can be stored for up to 3 months. When you’re ready to enjoy, thaw the slices in the refrigerator overnight. This gentle method keeps the cheesecake’s rich flavor and smooth consistency intact.
What if my cheesecake cracks while baking?
Don’t worry! Cracking can happen, but it’s generally a sign that the cheesecake is overbaked or that there was too much air whipped into the filling. To prevent it, bake at a lower temperature and keep an eye on it towards the end of the baking time. The edges should be firm and set while the center remains a bit jiggly. If there are cracks, consider topping it with whipped cream or a drizzle of chocolate sauce—it adds charm and tastes delightful!
Is this recipe suitable for people with allergies?
Definitely! The Holiday Chocolate Peanut Butter Cheesecake contains common allergens like dairy and peanuts, so be mindful of your guests’ dietary restrictions. For a nut-free version, you can substitute the peanut butter with sunbutter or a nut-free spread. Always check ingredient labels to ensure they meet your dietary needs, especially if you’re serving friends with allergies or other sensitivities.
Can I use a different type of crust?
Absolutely! While graham crackers make a fabulous base, you can let your creativity flow! Try crushed Oreos for a chocolatey twist, or use almond flour mixed with melted butter for a gluten-free option. It’s wonderful to customize your crust to match your taste preferences while still delivering that unforgettable Holiday Chocolate Peanut Butter Cheesecake experience!
Equipment
- mixing bowl
- springform pan
- Whisk
- oven
Ingredients
Crust
- 1 cup crushed graham crackers
- 1/2 cup unsalted butter melted
Filling
- 16 oz cream cheese softened
- 3/4 cup granulated sugar
- 1 cup creamy peanut butter
- 1 cup heavy whipping cream whipped to stiff peaks
- 1/2 cup unsweetened cocoa powder
- 1 tsp vanilla extract
Instructions
Preparation
- Preheat your oven to 350°F (175°C).
- Mix the crushed graham crackers with the melted butter in a bowl and press into the bottom of a springform pan.
- Beat the cream cheese and sugar until smooth, then add peanut butter and cocoa powder, mixing well.
- Whip the heavy cream to stiff peaks and fold into the cream cheese mixture.
- Pour half the filling over the crust, swirl in extra peanut butter if desired, and top with remaining filling.
- Bake for 50-60 minutes until edges are set and center jiggles slightly.
- Cool at room temperature for 1-2 hours, then refrigerate for at least four hours or overnight.

Leave a Comment