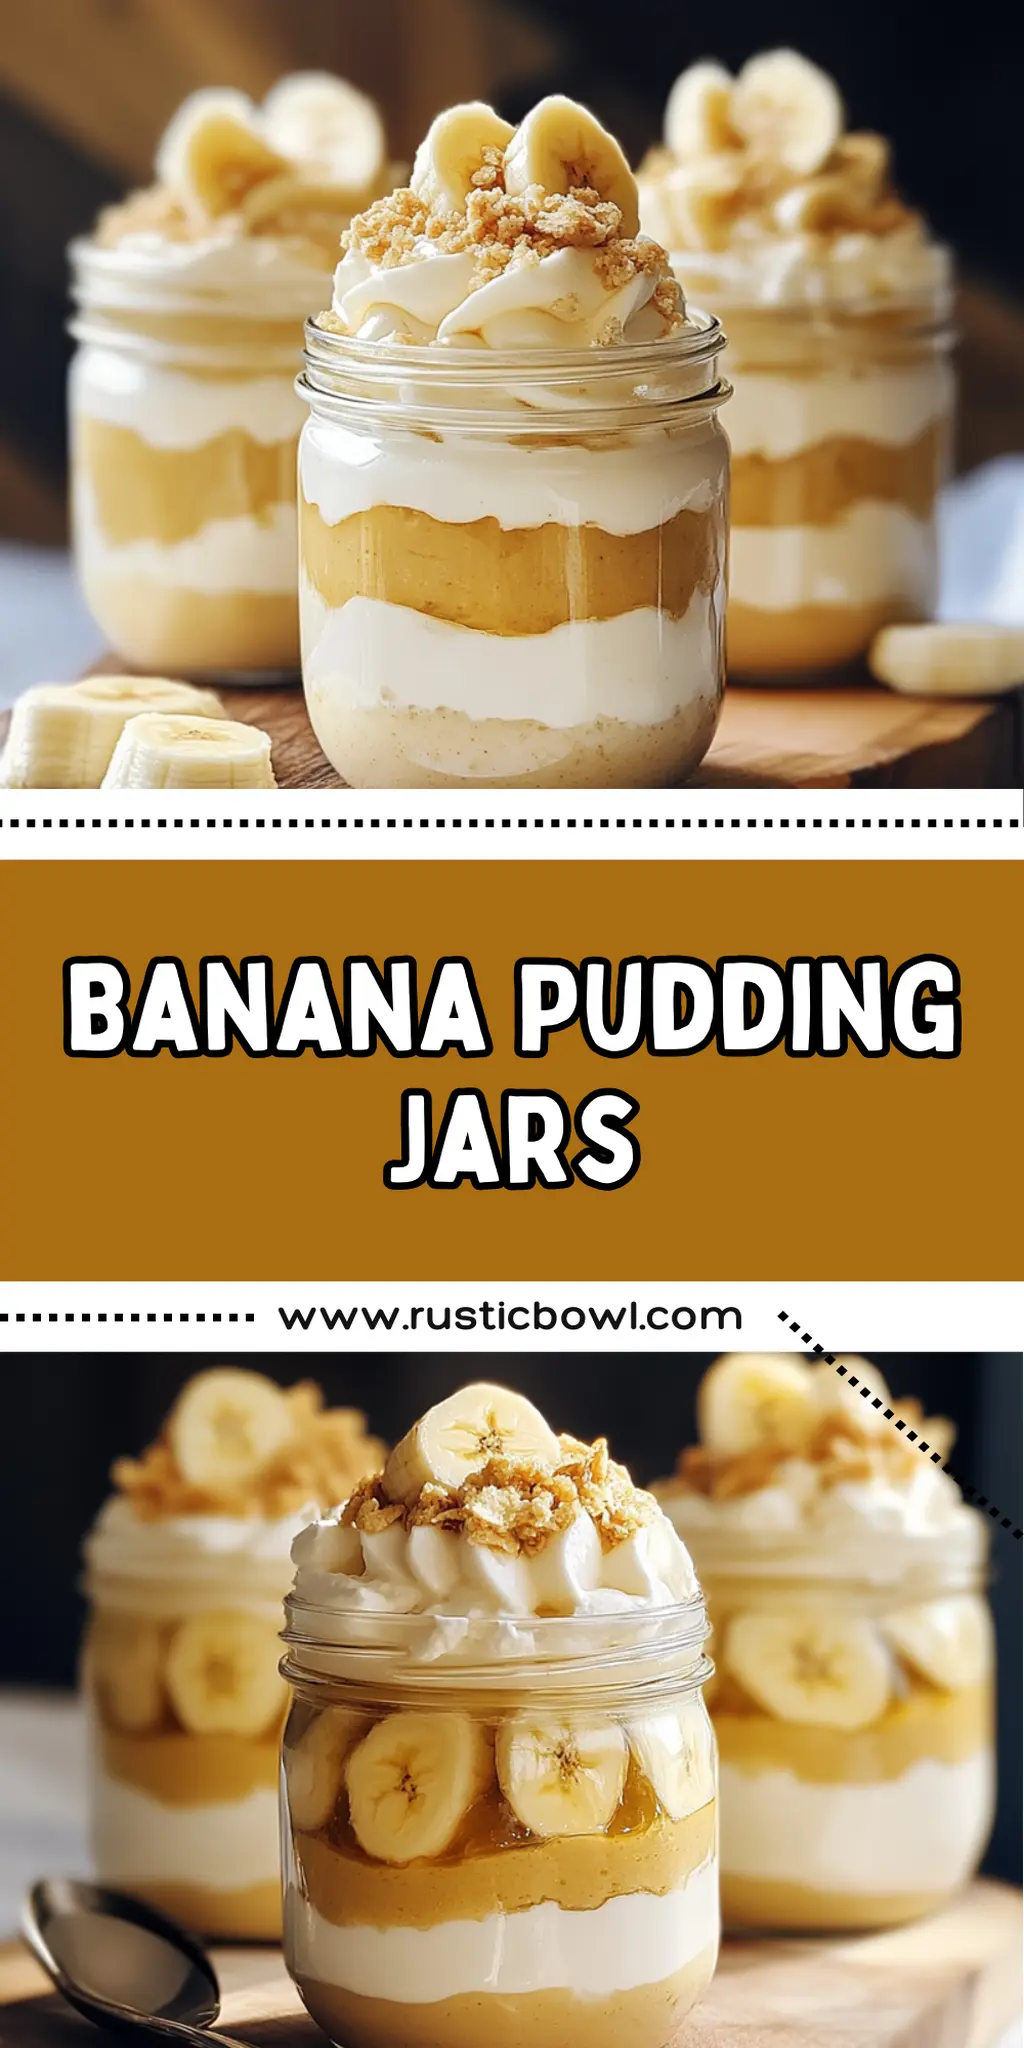
There’s something irresistibly nostalgic about the creamy layers of a classic banana pudding, isn’t there? Picture this: the sweet scent of ripe bananas mingling with the velvety smoothness of vanilla pudding, all tucked between crunchy Nilla wafers. I know what you’re thinking—how can something so indulgent be this easy to whip up? That’s the beauty of these Banana Pudding Jars!
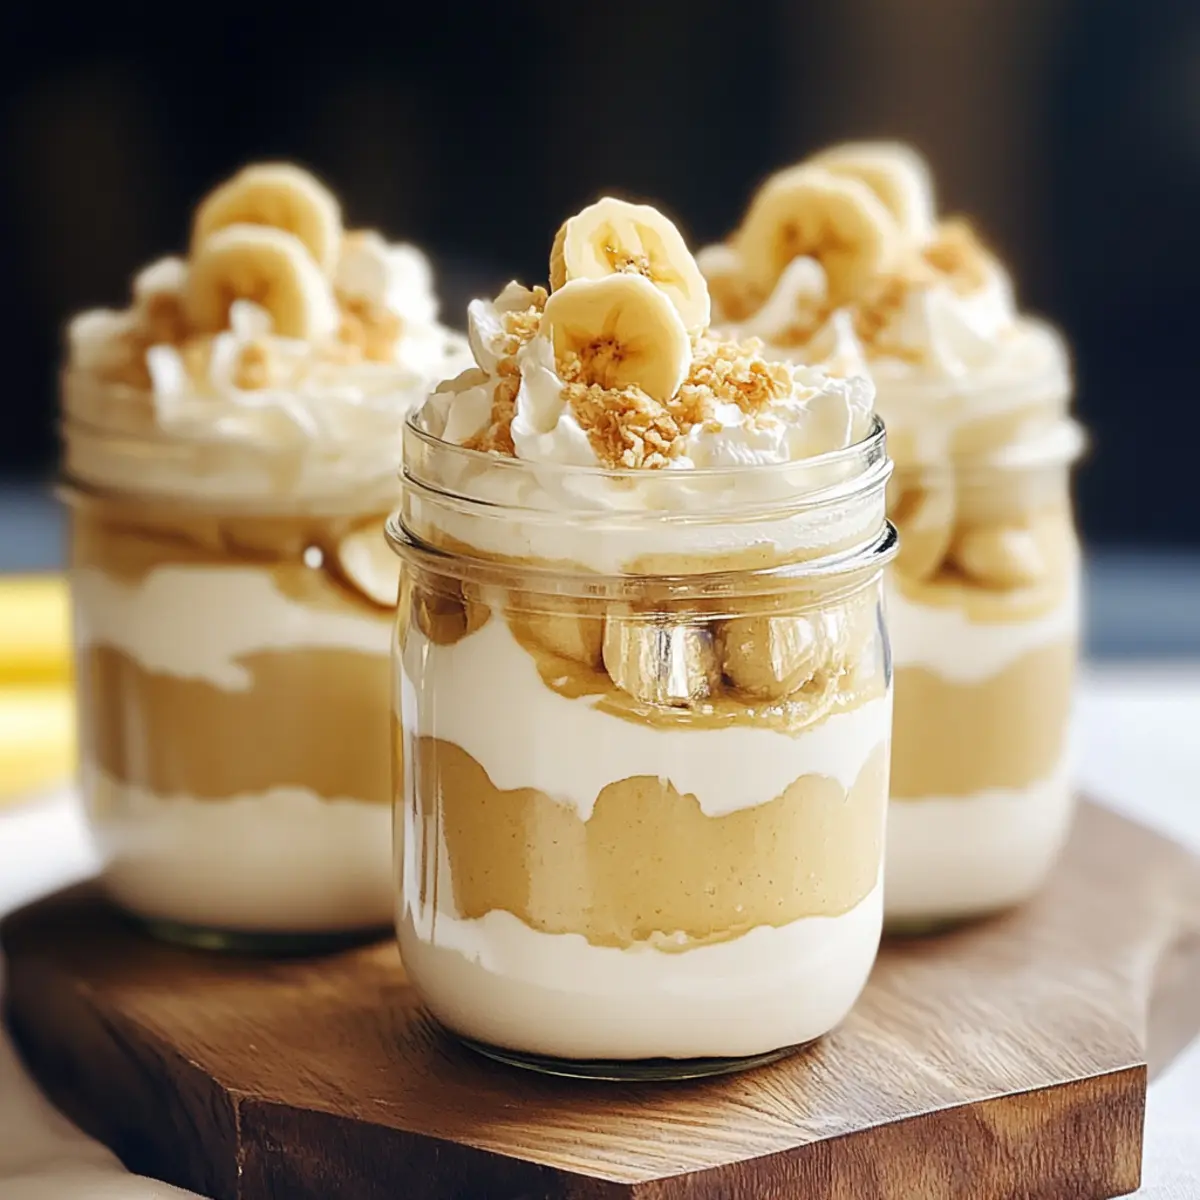
When I first decided to create this recipe, I was looking for a quick dessert that could impress without turning my kitchen into a disaster zone. These charming little jars do just that. From their delightful presentation to the delightful taste that transports you back to Grandma’s kitchen, they are a hit with everyone—from kids clamoring for sweets to adults seeking a taste of comfort.
So, let’s break out that box of instant pudding mix and get ready for a delicious adventure that serves up satisfaction in every spoonful, all while fitting perfectly into your busy day.
Why You'll Love This Banana Pudding Jars
- These Banana Pudding Jars are a breeze to make, taking only 15 minutes of your time for prep, making it a perfect dessert for busy days.
- The layered combination of creamy vanilla pudding, sweet bananas, and crunchy Nilla wafers creates an explosion of flavor in every bite that will leave you craving more.
- Their playful presentation in individual jars adds visual appeal to any gathering, making them an instant crowd-pleaser.
- Plus, you can easily customize them with gluten-free cookies or your favorite toppings, making this dessert as versatile as it is delicious.
Banana Pudding Jars Ingredients
• Dive into the layers of deliciousness with these must-have ingredients for Banana Pudding Jars!
For the Pudding Base
- Instant vanilla pudding mix – a quick and easy way to achieve that creamy texture without the fuss.
- Whole milk – enhances the richness of the pudding; you can substitute with almond milk for a dairy-free option.
For the Layers
- Ripe bananas – their natural sweetness adds a delightful contrast to the creamy pudding; pick ones that are just yellow with a few brown spots for optimal flavor.
- Nilla wafers – these classic cookies give a satisfying crunch; feel free to swap for gluten-free cookies if needed.
For the Topping
- Whipped topping – use store-bought for convenience, or make your own for a fresh touch that elevates the dessert’s elegance; this layer seals in the flavors beautifully.
With these ingredients at hand, you’re just a few steps away from creating your very own indulgent Banana Pudding Jars!
How to Make Banana Pudding Jars
-
Whisk together: In a medium bowl, combine the instant vanilla pudding mix with the whole milk. Use a whisk until the mixture is smooth. Let it rest for about 5 minutes for the pudding to thicken beautifully.
-
Slice bananas: Take your ripe bananas and slice them into half-inch rounds. These sweet, soft pieces will add a lovely texture to your dessert.
-
Layer the jars: Begin layering in individual jars by adding a dollop of your thickened pudding. Follow this with a layer of banana slices and a sprinkle of crushed Nilla wafers for that perfect crunch.
-
Repeat layering: Repeat the layering process, continuing with the pudding, bananas, and wafers until the jars are nearly full. Remember to save some space on top for the whipped topping!
-
Chill out: Cover the jars and place them in the refrigerator for at least 2 hours. This chill time allows all the flavors to meld together, creating a harmonious taste experience.
-
Serve and enjoy: Just before serving, top each jar with a generous dollop of whipped topping. For an extra touch, garnish with a slice of banana or a single Nilla wafer on top.
Optional: Add a sprinkle of cinnamon for a warming twist.
Exact quantities are listed in the recipe card below.
How to Store and Freeze Banana Pudding Jars
Fridge: Store any leftover Banana Pudding Jars in the refrigerator for up to 3 days. Ensure they are covered tightly to maintain freshness and prevent the bananas from browning.
Freezer: While it’s not ideal to freeze assembled Banana Pudding Jars, you can freeze the pudding mixture for up to 2 months. Just thaw in the refrigerator before layering with bananas and wafers.
Reheating: If the pudding has been frozen and thawed, use it cold. For an elevated experience, consider reheating the jars slightly in the microwave for a few seconds and then topping with whipped cream.
What to Serve with Banana Pudding Jars?
Elevate your dessert experience by pairing these delightful jars with complementary favorites that bring out their sweet charm.
-
Warm Biscotti: Crispy and crunchy, biscotti adds a lovely texture contrast that complements the rich creaminess of the pudding.
-
Coffee or Espresso: A rich, bold cup of coffee enhances the flavors of the banana pudding, making each spoonful even more satisfying.
-
Fresh Berries: A medley of juicy strawberries or blueberries provides a burst of tartness that balances the sweetness of the pudding jars.
-
Coconut Flakes: Toasted coconut sprinkled on top will add a tropical twist, enhancing the creamy layers with a subtle nuttiness.
-
Chocolate Sauce: Drizzling a bit of warm chocolate sauce over the top creates an indulgent touch that chocolate lovers will adore.
-
Homemade Whipped Cream: While you probably already use whipped topping, making your own adds a fresh touch, enriching the flavor profile wonderfully.
Enjoy these sumptuous pairings to create an unforgettable dessert experience!
Make Ahead Options
These Banana Pudding Jars are an excellent choice for meal prep enthusiasts looking to save time during busy weeknights! You can prepare the pudding and layer it with the bananas and Nilla wafers up to 24 hours in advance—simply refrigerate the assembled jars to keep them fresh. A key tip is to slice the bananas just before layering to prevent browning, or if you prefer, you can prepare them separately and add them to the jars right before serving. When you’re ready to enjoy this delightful dessert, just top each jar with whipped topping and garnish with a banana slice or wafer for that perfect finishing touch, ensuring they’re just as delicious as when freshly made!
Banana Pudding Jars Variations
Feel free to play around with these suggestions and make this delightful dessert truly yours!
- Dairy-Free: Substitute whole milk with almond or coconut milk for a creamy, dairy-free version that retains all the delicious flavor.
- Nutty Crunch: Incorporate crushed nuts like walnuts or pecans in between the layers for a lovely crunchy surprise that adds a nutty richness.
- Chocolate Twist: Mix in chocolate pudding instead of vanilla for a delightful chocolaty version that takes the classic recipe to a whole new level.
- Spicy Kick: Add a pinch of cinnamon or nutmeg to your pudding mix for a warm and cozy flavor twist that elevates the entire dessert.
- Seasonal Fruits: Swap out bananas for seasonal fruits like strawberries or peaches to create a refreshing, fruity variation that bursts with seasonal flavor.
- Low-Sugar: Use sugar-free pudding mix and reduce or omit the whipped topping for a lighter dessert that still satisfies the sweet tooth.
- Gourmet Touch: Drizzle caramel sauce between the layers for an indulgent treat that adds an extra touch of sweetness and richness.
- Mini Versions: Serve in shot glasses for a fun twist—these adorable mini servings are perfect for parties and are sure to impress!
Chef's Helpful Tips
- When making Banana Pudding Jars, always let your pudding mixture sit for about 5 minutes after whisking to ensure it thickens properly.
- Be careful not to slice your bananas too thin, as thicker pieces hold up better in the jars and provide a nice texture.
- To prevent your Nilla wafers from becoming too soggy, layer them strategically between the pudding and bananas for the best crunch.
- Make sure to chill the assembled jars for at least 2 hours so the flavors meld beautifully before serving.
Banana Pudding Jars Recipe FAQs
How do I choose the right bananas for my Banana Pudding Jars?
Absolutely! Look for bananas that are just ripe, with a bright yellow peel and a few brown spots. This is the sweet spot for flavor and texture—too firm, and they won’t blend nicely; too overripe, and they’ll mush too easily.
How should I store leftover Banana Pudding Jars?
Very simple! Store any uneaten jars in the refrigerator for up to 3 days. Make sure they’re covered tightly with plastic wrap or a lid to retain their freshness and prevent the bananas from browning.
Can I freeze Banana Pudding Jars?
While freezing the assembled jars isn’t ideal due to the texture of the bananas, you can freeze the pudding mixture itself. To do this, pour it into an airtight container, label it with the date, and store it in the freezer for up to 2 months. When you’re ready to use it, just thaw it in the refrigerator overnight, then layer with fresh banana slices and Nilla wafers for the best texture.
What should I do if my pudding turns out too runny?
Oh no! If your pudding is too runny, you can try whisking in more instant pudding mix—just add it in slowly, a tablespoon at a time, to avoid clumps. Let it sit for another few minutes to thicken. Always ensure you’re using the correct milk measurement and whisking well for a smooth texture.
Are Banana Pudding Jars suitable for those with allergies?
Yes! You can easily customize Banana Pudding Jars to meet dietary needs. For dairy-free options, use almond or oat milk and substitute the whipped topping with a coconut cream variant. If you have nut allergies, make sure to choose gluten-free cookies without nut ingredients to ensure it’s safe for everyone.
How far in advance can I make Banana Pudding Jars?
Making them in advance is a great idea! You can prepare the jars up to 24 hours in advance. Just remember to cover them and store them in the refrigerator to blend all those wonderful flavors, ensuring you have a delightful dessert ready when needed.
Equipment
- medium bowl
- Whisk
- individual jars
Ingredients
Pudding Base
- 1 box instant vanilla pudding mix
- 2 cups whole milk or almond milk for a dairy-free option
Layers
- 3 medium ripe bananas sliced
- 1 box Nilla wafers or gluten-free cookies
Topping
- 1 cup whipped topping store-bought or homemade
Instructions
Making the Pudding
- In a medium bowl, combine the instant vanilla pudding mix with the whole milk. Whisk until the mixture is smooth and let it rest for about 5 minutes to thicken.
Preparing the Bananas
- Slice the ripe bananas into half-inch rounds.
Layering the Jars
- Layer the jars starting with a dollop of pudding, followed by banana slices and crushed Nilla wafers. Repeat until jars are nearly full.
Chilling
- Cover the jars and refrigerate for at least 2 hours to meld the flavors together.
Serving
- Before serving, top each jar with whipped topping and a slice of banana or a Nilla wafer on top.


Leave a Comment